Showing posts with label Arachnid Quarter. Show all posts

Tuesday, December 23, 2008

Naxx Strategies

Arachnid Quarter


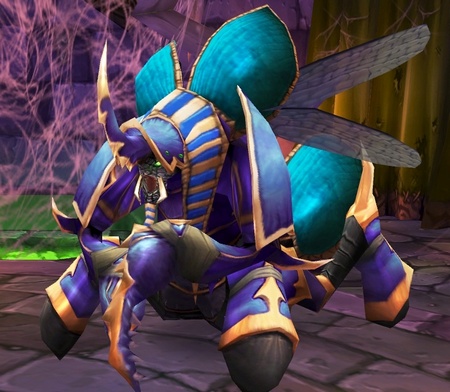
Anub'Rekhan: There is a complicated, highly coordinated way to do this and a more simple, healing intensive way to do this. Since, I'm a healer, I've chosen the latter.

ABILITIES:
Impale-This is an area of effect ability that targets a random player and hits everyone in a straight line between Anub'Rekhan and the player. It will do 4813 to 6187 physical damage and launch the affected players high in the air, causing 50% fall damage when they hit the ground.

LOCUST SWARM: Every 70-120 seconds, Anub'Rekhan casts a spell that causes AoE damage in a wide radius (30 yards) around him (the AoE remains centered on Anub'Rekhan as he moves), he will also slow to 75% of normal run speed. Remaining in the radius of effect will cause a DoT debuff to stack repeatedly dealing 875 to 1125 nature damage every 2 seconds per stack as well as silencing those afflicted. When he casts this spell, a Crypt Guard will also spawn at his initial engage point. Lasts 16 seconds.

NOTE: The Locust Swarm attack has an approximately 90 second cooldown, however the first cast is not at a set time, between 80 seconds and 2 minutes. As well, the Locust Swarm is not a normal silence. Unlike a normal silence, it prevents the use of all abilities (even auto-attack). This means that the MT cannot use Shield Wall or Last Stand to save himself if he gets stacked too high. Items, however, are still able to be used.

Summon Corpse Scarab: Whenever there is a corpse in the room (either a player or a Crypt Guard) Anub'Rekhan may decide to spawn corpse scarabs from it. This is not on a set timer. Ten will be spawned from a Crypt Guard and Five from a player. They spawn with threat on random players and will spread out and attack random targets.

Additional Adds: One of these adds will spawn after every Locust Swarm. In addition, one spawns approximately twenty seconds after Anub'Rekhan is pulled. They have around 234,000 health. They have a cleave, a stacking acid spit DoT that ticks for 500 a stack, and a low-hp frenzy that increases damage by 50% and attack speed by 60%.


Strategy:The tank needs to stay put and take the full damage of the swarm while the healers spam heals on him. This is entirely possible and will make the fight more of a tank and spank with extra healing on the swarm. Death knights are good tanks for this tactic because they can time their damage reduction ability with the swarm and take less damage. Tanks simply have to make sure that they use their damage reduction ability before the swarm because it silences them.

Once you enter the area where Anub'Rekhan is located have a hunter misdirect (if available) onto the main tank and pull the boss to the actual entrance doorway area and tank it there whilst the rest of the raid runs forward and splits into a semi circle roughly in the center of the room. Have your secondary tank behind everyone where the adds spawn. All ranged DPS should spread around like usual to avoid the impale. The offtank can add some DPS or even some offhealing to the party but needs to make sure that he stays ready to pick up the adds that will spawn in the back, as the add can easily one-shot a cloth wearer. Once the add spawns and the offtank picks it up, all the DPS has to do is simply turn around and burn it down. When the Corpse Scarabs spawn, they just turn around again, then again turn back to the boss. This tactic is meant to reduce any kind of confusion in the kiting method so separating the boss and the add makes the fight really simple. Remember that this method will only really work if your healers keep the main tank topped up, especially during the locust swarm. Any offhealers such as shamans or paladins present during the locust swarm should help to keep the main tank alive.

Remember that the tank will take massive damage at the end of the swarm so extra healing from a third or fourth healer is always good to have.

If we can't heal this we'll go to Plan B which includes kiting the boss during locust swarm.

Monday, December 22, 2008

Grand Widow Faerlina


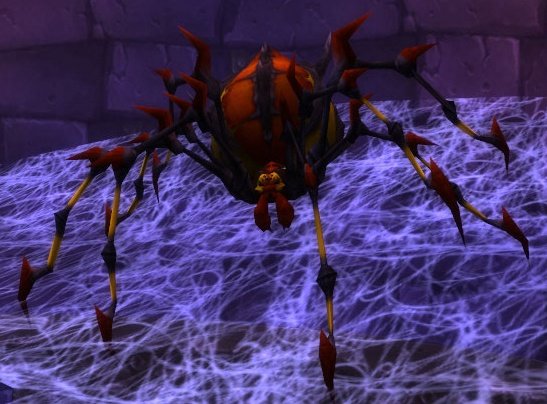
This fight looks kind of fun. It will be dependent on the tank being very aware of what's going on and dps switching targets at exactly the right time.

ABILITIES

Poison Bolt Volley: This will hit the three closest players to Grand Widow Faerlina, used every on average every 12 to 15 seconds, but sometimes with as little as seven or eight seconds between casts. Deals 2625 to 3375 Nature damage and applies a dot that does 1480 to 1720 Nature damage every 2 seconds for eight seconds. Dispellable. Widow's Embrace prevents the use of this ability for 30 seconds.

Rain of Fire: Random Rains of Fire will be cast on players throughout the fight, at intervals of anywhere from six to eighteen seconds. 1750 to 2750 Fire damage every two seconds. Rain of Fire lasts six seconds. 8 yard radius.

MOST IMPORTANT SINCE IT WILL CAUSE WIPE: Frenzy: This will be used approximately every 60–80 seconds. It will increase Grand Widow Faerlina's physical damage by 150%, her melee haste by 50% and her size by 50%. During it she will hit the tank for upwards of 15,000 damage. Widow's Embrace, caused by killing a worshipper, dispels and prevents the use of this ability for 60 seconds.

Strategy:
You will need two tanks. Worshippers should be clearly marked and DPS should know exactly what the kill order is. One tank will pick up the worshippers and offtank them right under the stairs on the left side. Any tank class is good at tanking them, as they don't deal high loads of damage. The main tank will pick up Faerlina after the OT pulls the rest and drag her to the middle of the room where everyone will spread out around her. Every DPS should focus ONLY in Faerlina, ignoring the four adds till the enrage phase is near.

The off-tank will pick all four adds, and start DPSing one of them: the one who must be killed in order to stop Faerlina's Frenzy.

When the frenzy is about to come off cooldown (10 secs or so) every DPS should stop all DPS and switch target to the worshipper marked to kill. Do not start attacking it, just target it and be in range for attacks. The main tank should go where the OT is, the closer the better, taking Faerlina with him. The Offtank should have lowered the worshipper's health to 15% or less. If the OT is doing more damage than that and actually close to killing the adds, he should just sit there and stop doing any damage.

When the enrage is up, all DPS should burst their CD to insta-kill the worshipper. If done properly Faerlina's enrage should fade, and MT can move Faerlina back to the center of the room, where DPS can resume on her.

Rinse & Repeat every time the enrage timer is close.


Maexxna


Tank and Spank with lots of adds, sleeps, and aoe. 2 Dps needed to take down the webbings from web wrap.

ABILITIES

Web Wrap: Cast at the 20 second mark, and then every 40 seconds after that. Sends one player flying towards the webs on the Western side of the wall, encasing them in a cocoon and incapacitating them. This ability sends the player to the same place all the time, and therefore positioning the DPS where the cocoons will spawn makes for much easier destruction of the cocoon. When encased, 2475 to 3025 Nature damage is done every 2 seconds. The cocoon, which is called "Web Wrap" and has about 6,000 health, can be destroyed from the outside.

Web Spray: Cast every 40 seconds incapacitating everyone in the room including the tank for 6 seconds, dealing 1750 to 2250 Nature damage. This ability cannot be resisted, and the only way to avoid it is to be dead.

Poison Shock: Inflicts 3500 to 4500 Nature damage in a 15 yard frontal cone in front of Maexxna every 10 seconds.

Necrotic Poison: Reduces healing taken by 90% for 30 seconds. This needs to be cleansed immediately, preferably with a shaman totem. Applied to targets in melee range in front of Maexxna, generally the tank.

Frenzy: At 30% health, Maexxna will go into a killing frenzy that cannot be removed. Increases physical damage by 50%, melee haste by 50% and size by 15%.

Spiderlings: 8 Small spiders are spawned at the 30 second mark, and then every 40 seconds after that. These hit for about 1,000 on cloth and have about 7,300 HP.

Strategy: Before the encounter begins have your raid move into the lair to the southwest side (left for the directionally challenged). In front of you will be the boss and a rectangular column poking through the web. Your tank will engage Maexxna at the protruding column while your ranged DPS and healers set up to the west. If you have a mage it is beneficial to have them down with the melee to Frost Nova the spiders when they are summoned and then AOE them down. When someone is in Web Wrap they will be flung to one of two spots on the western wall. Designate two ranged DPS to destroy the webbing in case one of them gets wrapped. Once Maexxna is down to 33% health, stop DPS and wait for a Web Spray. After that is done, blow all your cooldowns and enjoy the DPS race. Healers must keep the Main Tank at full health and use HoTs in case your DPS is unable to bring down the boss. A good tip for warrior tanks is to use Shield block every Web Spray, the cooldowns line up well and it really helps the healers.